Campaign Template Selection
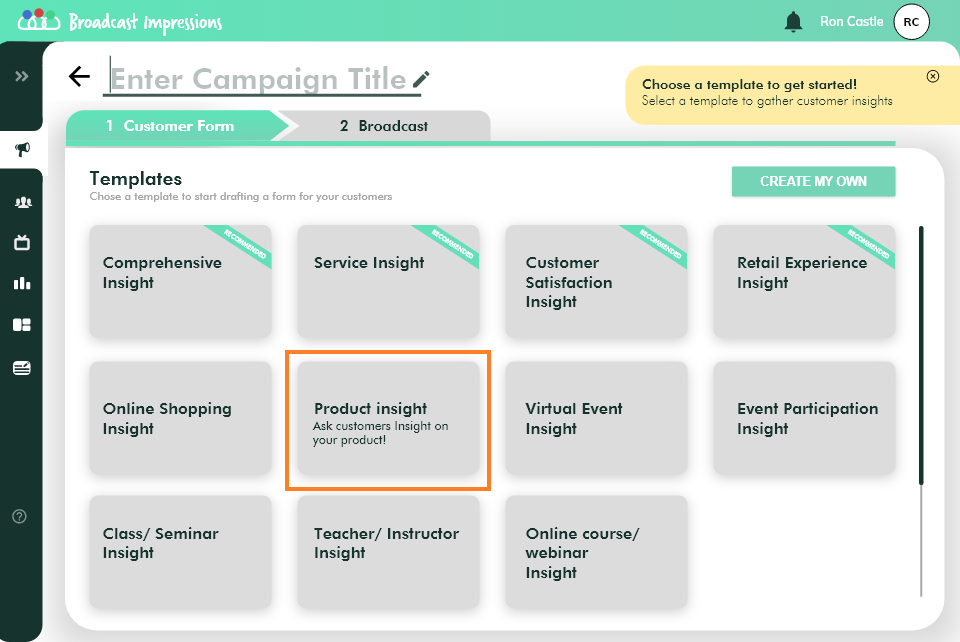
After logging into the tool, select a template from the list provided. These templates are pre-loaded with questions and answer options relevant to your business.
Click on a template to view the questions & answers.
Questions and Answer Options

Here, under the content tab you will be able to view all the pre-loaded questions and answer options for the template you just selected.
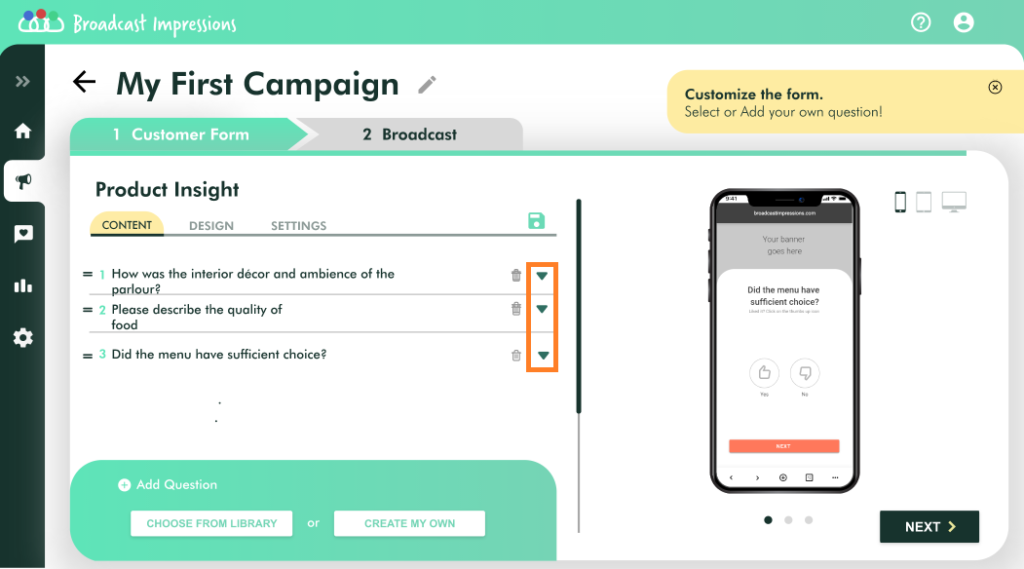
Click on the Drop-down arrow on the right-hand side of each question to view the Answer options and Question type for each question.
After verifying the questions and answers, click on the Next button.
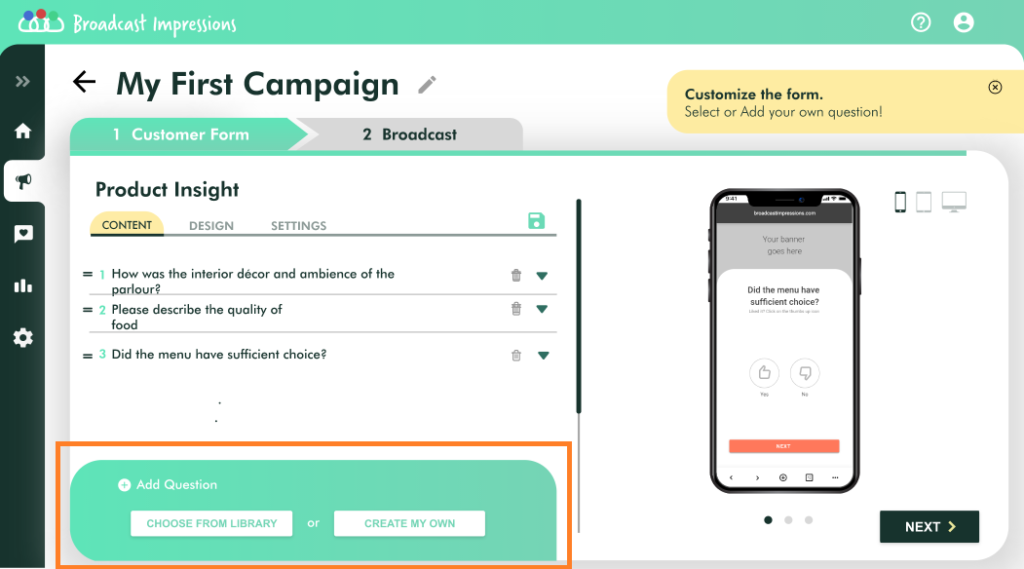
Adding New Questions
If you wish to add more questions to the form you can do so by clicking on CHOOSE FROM LIBRARY or CREATE MY OWN in the ‘Add Question’ section.
A pop up with a list of questions related to your business will be available for you to choose and customize.
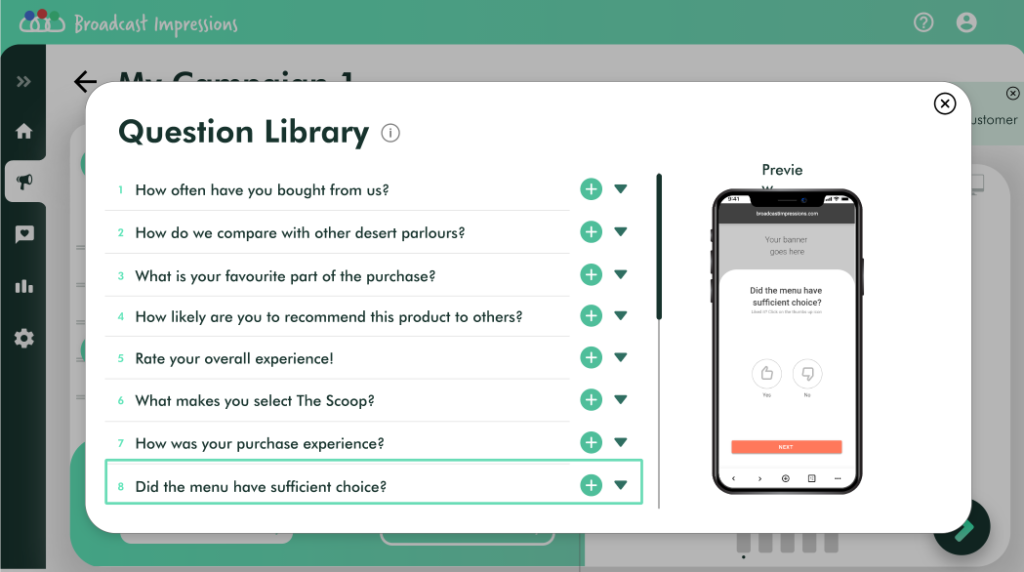
To add a question, click on the green add sign on the right hand side of each question.
New questions cannot be added after the form is finalized & URL created.
Choosing the Design and uploading a banner image
On the Design tab, you can add a banner image and choose a theme to further customize your form.
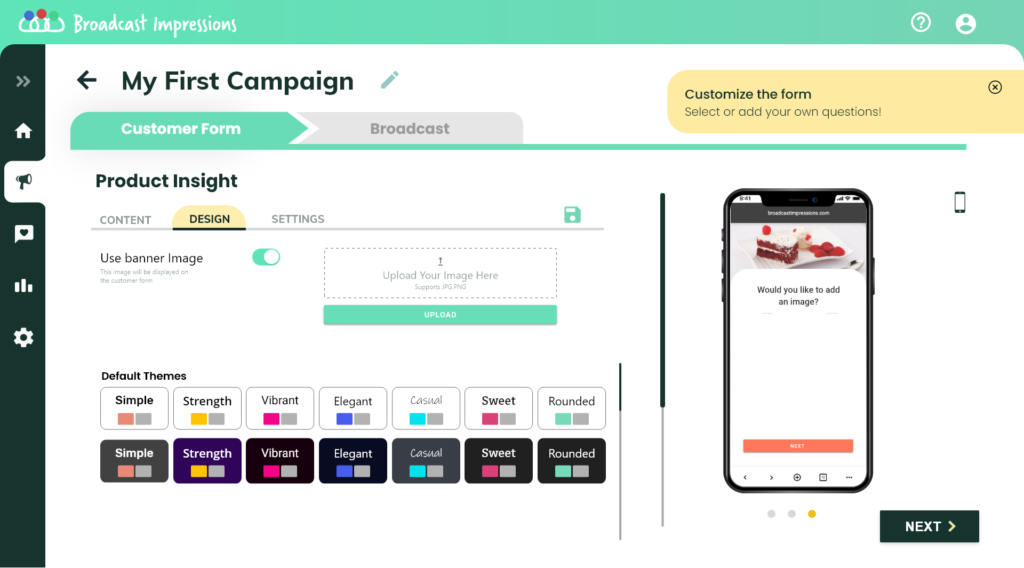
Toggle on the switch next to “Use Banner Image”.
Click on the upload button on the right side.
Upload an image from your PC.
Click on any theme under the Default Theme section. The colors and fonts from the selected theme will be applied to the form.
A preview of the selected theme will be shown on the RHS.
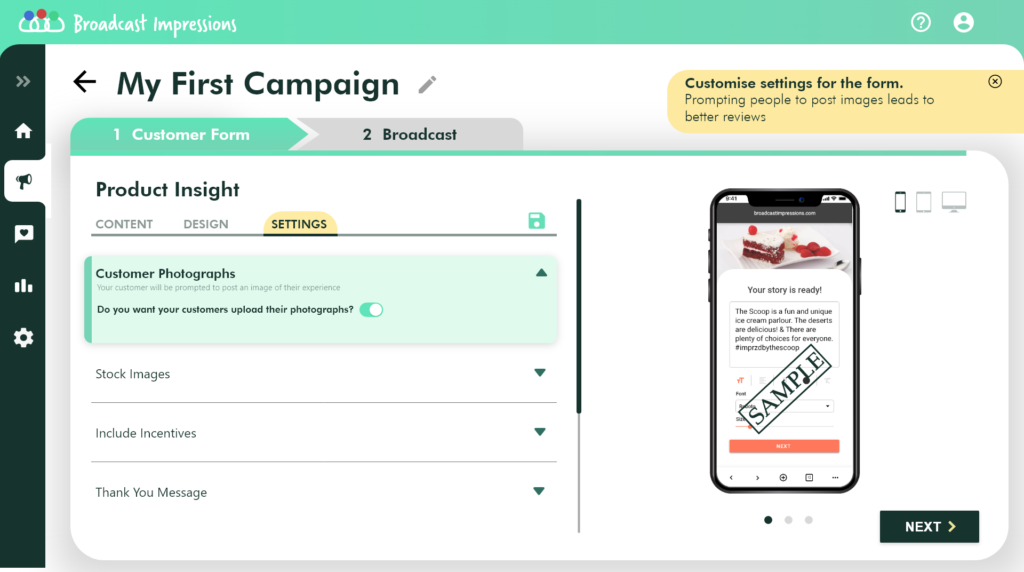
Settings Tab
On the settings tab, you will have the ability to upload stock images, let your customers choose or upload a picture, attach coupon codes and add a Thank you note.
To let your customers upload their images
Turn the on switch under ‘Customer Photographs’ tab to let your customers add their own images to the post.
To upload your stock images
Open the stock images tab by clicking on the arrow icon.
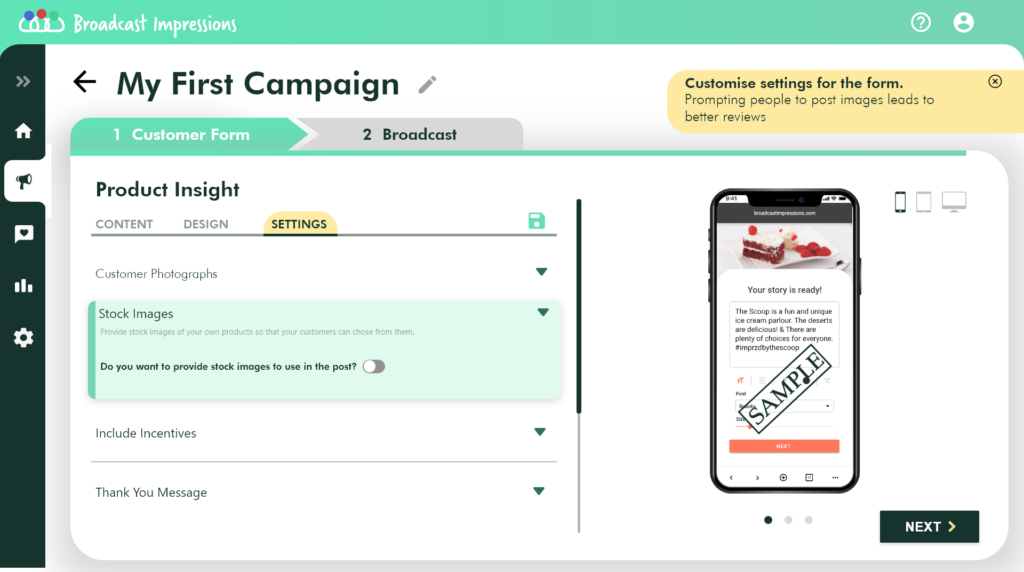
Toggle the on switch to view the upload button.
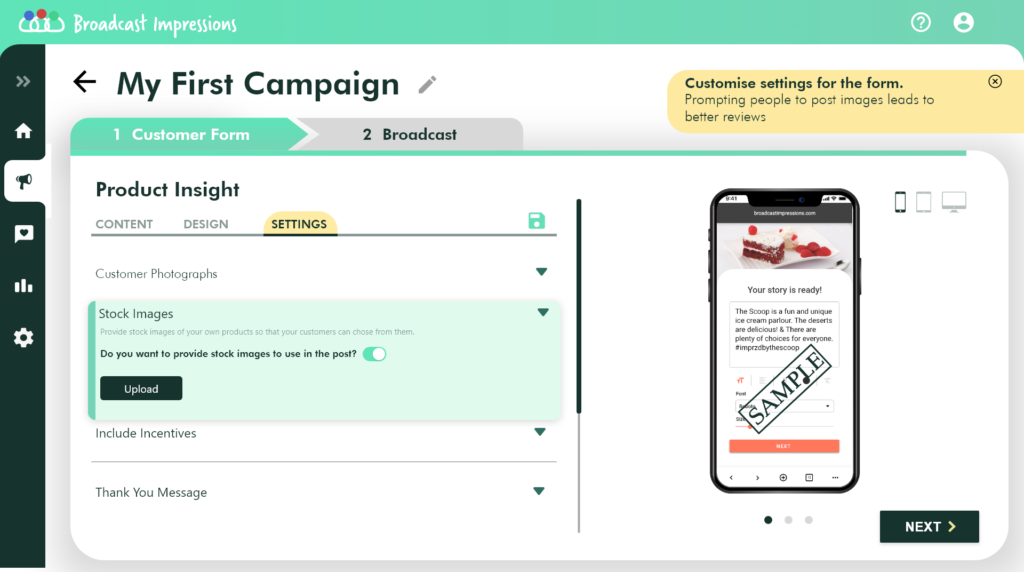
Click on the upload button and choose the stock images from your PC.
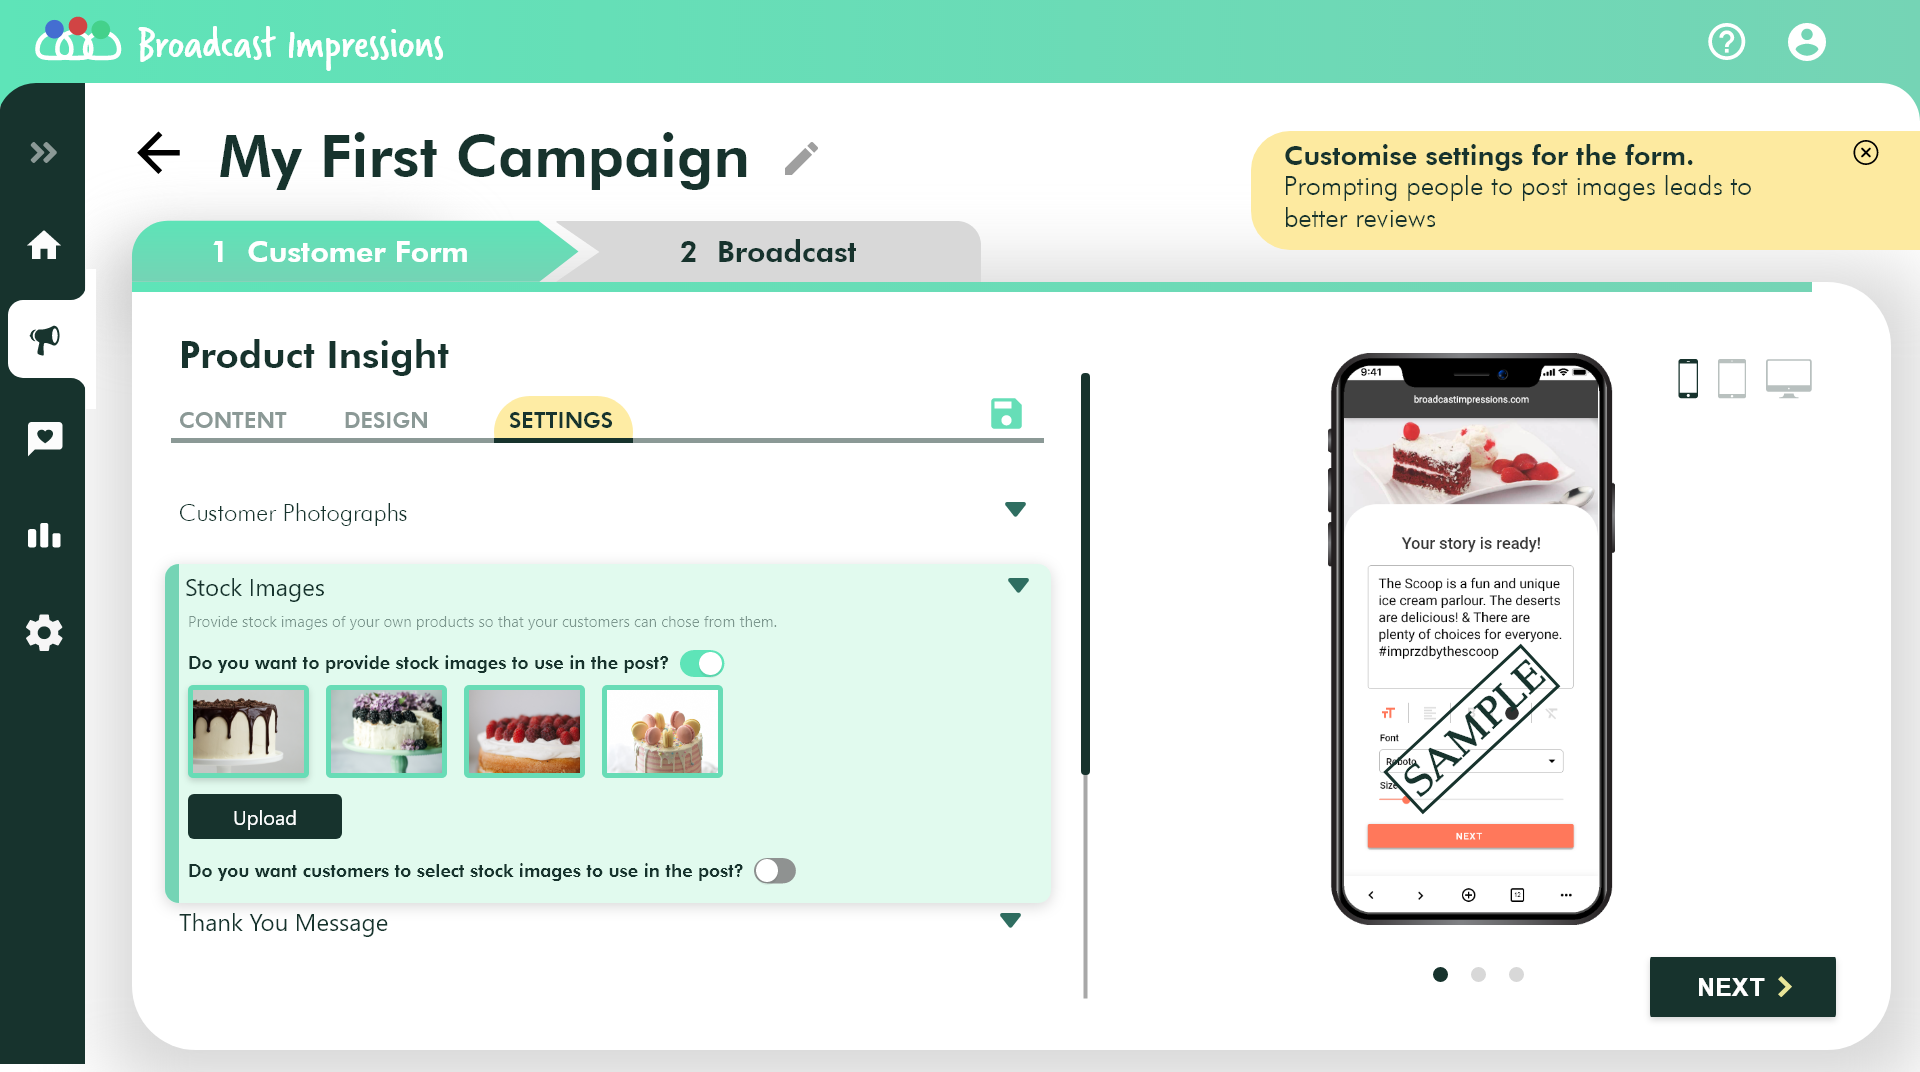
By default, posts will be created with one of the stock images randomly picked from the images you upload. If you want your customers to select an image of their choice, switch on the toggle below the upload button.

Click on the Next Button to save and publish your campaign.
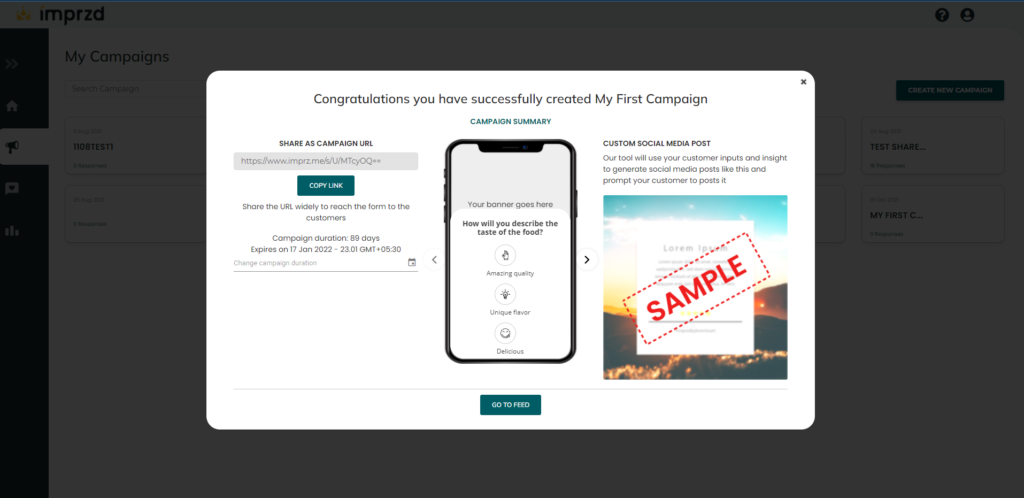
Saving a Campaign
Once you are ready you can name and save your campaign.
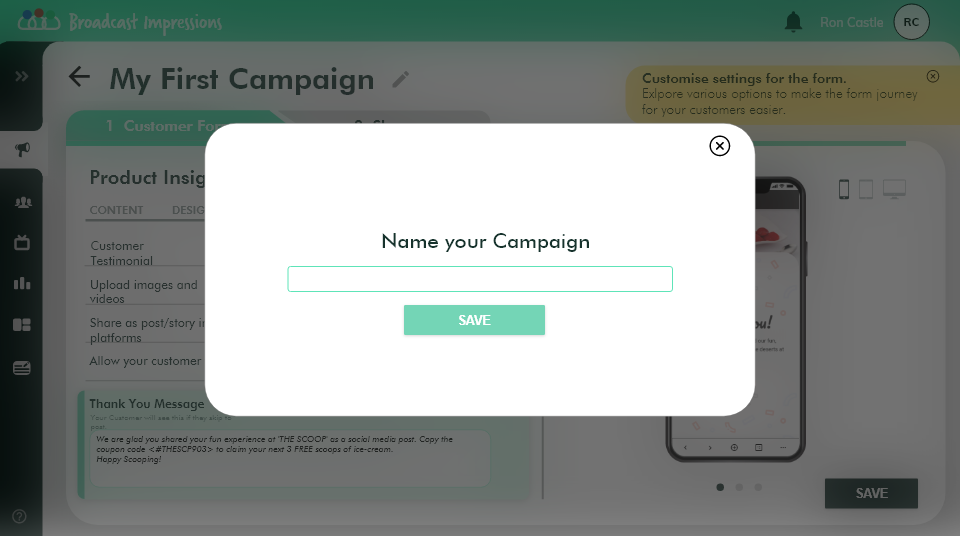
On clicking the Save button, a pop up with the campaign details will be displayed. Here you can go over the details of the campaign one more time before you publish it.
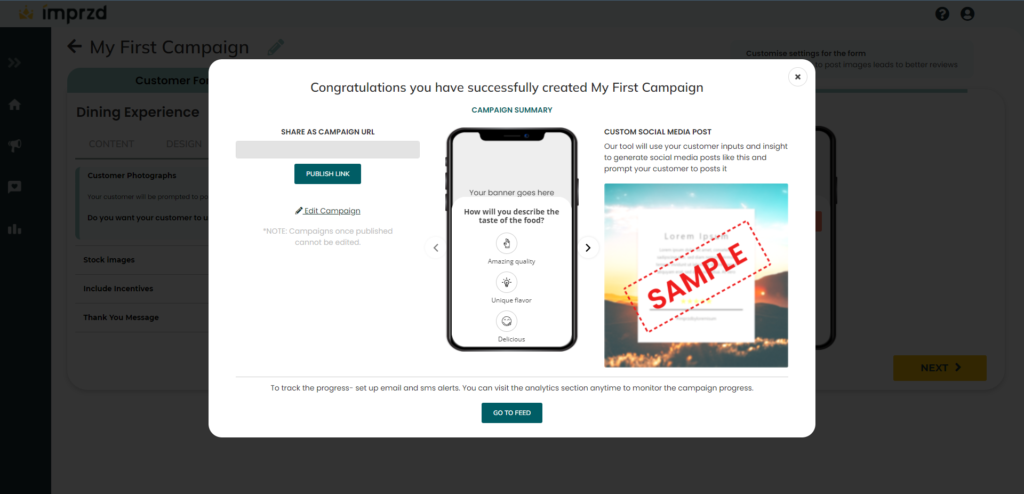
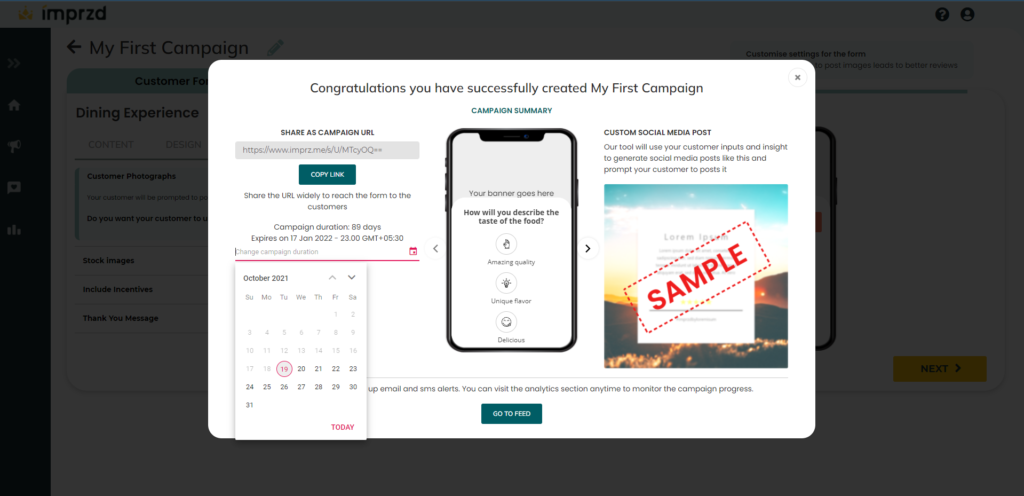
Click on the ‘Publish Link’ button on the LHS, Now your campaign is live and a link will be displayed in the box under ‘Share as campaign URL’. This link can be shared with your customers.
You also have the option to set the campaign duration. By default this is set to 3 months, from the date of publishing. To change the campaign duration, click on the calendar icon and set a date upto which you would like the campaign to be live.
To view all the campaigns you’ve created, Click on the campaign icon on the left side panel. This will open up a screen with all the campaigns that you have created.

Click on the campaign you’re willing to share with your customers and you will be taken to the screen with the summary details of the campaign.
Click on the copy button and share the URL via Email, WhatsApp, or SMS.